Embarking on a journey shouldn’t mean sacrificing the quality of your coffee.
Whether you’re trekking through mountain trails, hopping between cities, or simply commuting to work, having a well-prepared travel kit ensures you can enjoy your favorite brew wherever you roam.
In this guide, we’ll explore every essential item you need, tips for packing efficiently, and strategies to adapt your kit to different travel styles and destinations.
Why a Dedicated Travel Coffee Kit Matters
When you’re on the move, café options can be limited, inconsistent, or nonexistent. A travel coffee kit empowers you to:
- Maintain Consistency: Brew with the same tools and techniques you trust at home.
- Save Money: Reduce reliance on expensive café drinks.
- Enhance Experiences: Enjoy a ritualistic moment of calm in busy environments.
- Adapt Flexibly: Brew with hot water from hostel kettles, gas stoves, or even campfires.
By curating the right gear, you’ll streamline preparation and minimize packing bulk, all while preserving the taste and aroma you love.
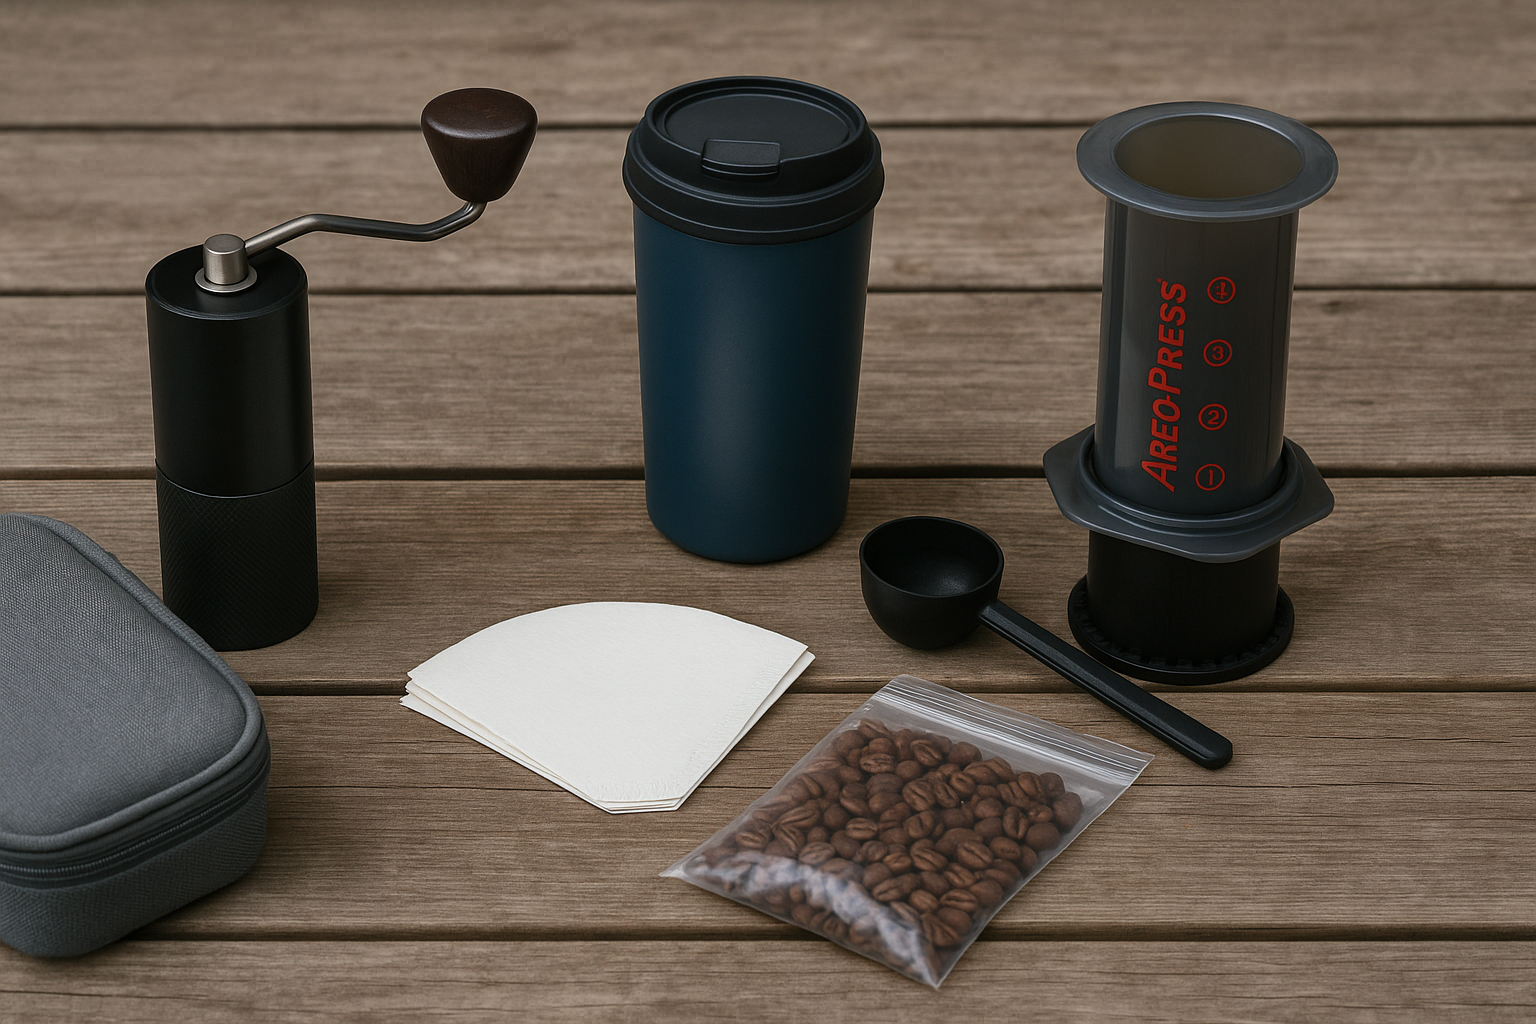
Core Components of Every Travel Coffee Kit
1. Portable Grinder
A quality grind is the foundation of great coffee. For travel, look for:
- Compact Size & Weight: Aim for under 300 g.
- Adjustable Burrs: Ceramic or stainless steel conical burrs with at least 15 grind settings.
- Foldable or Detachable Handle: To reduce length.
Recommended model: 1Zpresso Q2 or Timemore Nano—both balance grind consistency with packability.
2. Brewing Device
Choose one method to focus on, based on your taste preferences and available water sources:
- AeroPress Go: Lightweight (ca. 240 g), durable, easy cleanup. Ideal for espresso-style “inverted” brews or Americanos.
- Collapsible Dripper (e.g., Clever Dripper): Silicone drippers fold flat; you’ll need filters. Great for pour-over fans.
- French Press Mug: Double-walled travel mugs with integrated plunger (e.g., Espro Travel Press). Offers full immersion brew with built-in cup.
- Single-Serve Pour-Over Kits: Reusable silicone or stainless drippers paired with your mug. Best when traveling light.
3. Filters & Accessories
- Paper Filters: Pack a stack in a resealable bag—15–20 filters of your chosen size.
- Metal Filter: A fine-mesh stainless filter fits some AeroPress and pour-over setups; eliminates the need for paper.
- Measuring Spoon or Scale:
- Spoon: A 1-tablespoon coffee scoop works in a pinch.
- Scale: Travel scales like the Hario V60 Drip Scale are ultra-thin and precise to 0.1 g.
4. Kettle or Heat Source
- Foldable Silicone Kettle: Collapses flat, holds ~700 ml.
- Heat Adapter: If you often rely on stovetops, a compact alcohol burner or jet-boil stove can be invaluable.
- Universal Electric Kettle: Some hostels offer 110–240 V; consider a travel kettle with dual voltage.
5. Water Management
- Water Bottle with Filter: Sawyer Mini or LifeStraw for areas with questionable water quality.
- Travel Mug: Insulated stainless steel mugs (12–16 oz) double as brewing vessels and drinking cups.
6. Cleaning Supplies
- Small Brush or Cloth: For rinsing grounds out of your grinder and brewer.
- Biodegradable Soap Tablets: Dissolve to clean without harming the environment.
- Silicone Mat or Pouch: Keep wet parts contained and protect other gear.
Packing Strategies for Efficiency
Organize by Function
Group items in lightweight pouches:
- Brewing Kit Pouch: Dripper, filters, brush, cloth.
- Grinding & Measuring Pouch: Grinder, spoon/scale.
- Heat & Water Pouch: Kettle, fuel canister or electric adapter, water filter.
This organization minimizes rummaging and ensures quick setup.
Minimize Weight & Volume
- Prioritize Multi-purpose Gear: A travel mug that doubles as a brewing vessel saves space.
- Use Ziplock Bags: Compress soft items like filters and cloths.
- Evaluate Necessity: If you rarely use a metal filter at home, skip it for travel.
Protect Fragile Items
- Bubble-wrap or Padding: Wrap ceramic drippers or glass components in clothing.
- Hard Case for Grinder: Prevent burr damage if you’re backpacking or flying.
Adapt to Your Destination
- Urban vs. Wilderness: In cities, you can swing by specialty cafés for hot water. In remote areas, pack an alcohol stove and lightweight fuel.
- Climate Considerations: In cold climates, insulation retains heat; in hot, choose materials that resist warping.
Brewing Methods on the Road
AeroPress Go Technique
- Preheat: Rinse the cylinder and cap with hot water.
- Grind & Dose: 15–17 g medium-fine coffee.
- Brew: Add coffee to the inverted AeroPress, pour 200 ml water at ~93 °C, stir for 10 s, attach cap, flip and press in 20–30 s.
- Clean: Eject puck, rinse in seconds.
Portable Pour-Over
- Set Up Dripper: Place over your mug or travel vessel.
- Filter & Rinse: Wet filter to eliminate paper taste.
- Dose: 16 g medium grind coffee.
- Bloom: Pour 30 ml water, wait 30 s.
- Slow Pour: Add 200 ml over 2–3 pours, finishing at 2:30–3:00.
Immersion (French Press Mug)
- Add Grounds: 18 g coarse coffee to mug.
- Pour & Stir: 250 ml hot water, stir gently.
- Steep: 4 minutes with lid on.
- Press & Drink: Slowly press plunger and enjoy straight from the mug.
Troubleshooting Common Travel Brewing Challenges
Inconsistent Grind
- Problem: Inconsistent coarseness leads to uneven extraction.
- Solution: Clean burrs regularly; avoid dropping or jostling your grinder. Use burr-friendly travel cases.
Limited Hot Water
- Problem: Slow kettle or unreliable power.
- Solution: Pre-boil water in larger batches when possible; store in insulated bottle to reuse for multiple brews.
Waste Disposal
- Problem: Disposing of used grounds responsibly.
- Solution: Strain grounds into a dedicated pouch, then compost where allowed. Many parks prohibit food scraps—pack out as trash if needed.
Gear Maintenance
- Problem: Build-up of oils affects flavor.
- Solution: Carry O-ring lubricant for seal maintenance on AeroPress; perform quick rinses after each use and deeper clean weekly.
Tips for Elevating Your Travel Coffee Experience
- Local Water Profiles: Taste local water—if it’s too hard or soft, pack a small sachet of specialty coffee mineral blend to tweak TDS.
- Pre-measure Doses: Weigh and seal single-dose coffee in individual bags before you leave, saving time and reducing scale dependence.
- Embrace Single Origins: Travel is about discovery—buy local roasts and compare with your home beans using the same kit.
- Record and Share: Keep a travel coffee journal or social media log; note the gear, method, and tasting notes for each brew.
Sustainability Considerations
- Reusable Over Disposable: Metal filters, cloth wipes, and silicone bags reduce single-use waste.
- Ethical Sourcing: Support brands with fair-trade and direct-trade practices.
- Eco-Friendly Fuels: Choose denatured alcohol or bio-ethanol stoves over butane when possible.
Wrapping Up Your Travel Coffee Kit
A thoughtfully curated travel coffee kit bridges the gap between convenience and quality. By selecting compact, multi-functional tools—paired with simple packing strategies and adaptable brewing methods—you can savor exceptional coffee anywhere in the world. Remember, the goal is not just to replicate your home routine but to enhance your journey with moments of ritual, discovery, and connection. Pack smart, stay curious, and let every cup tell a story of the places you explore.